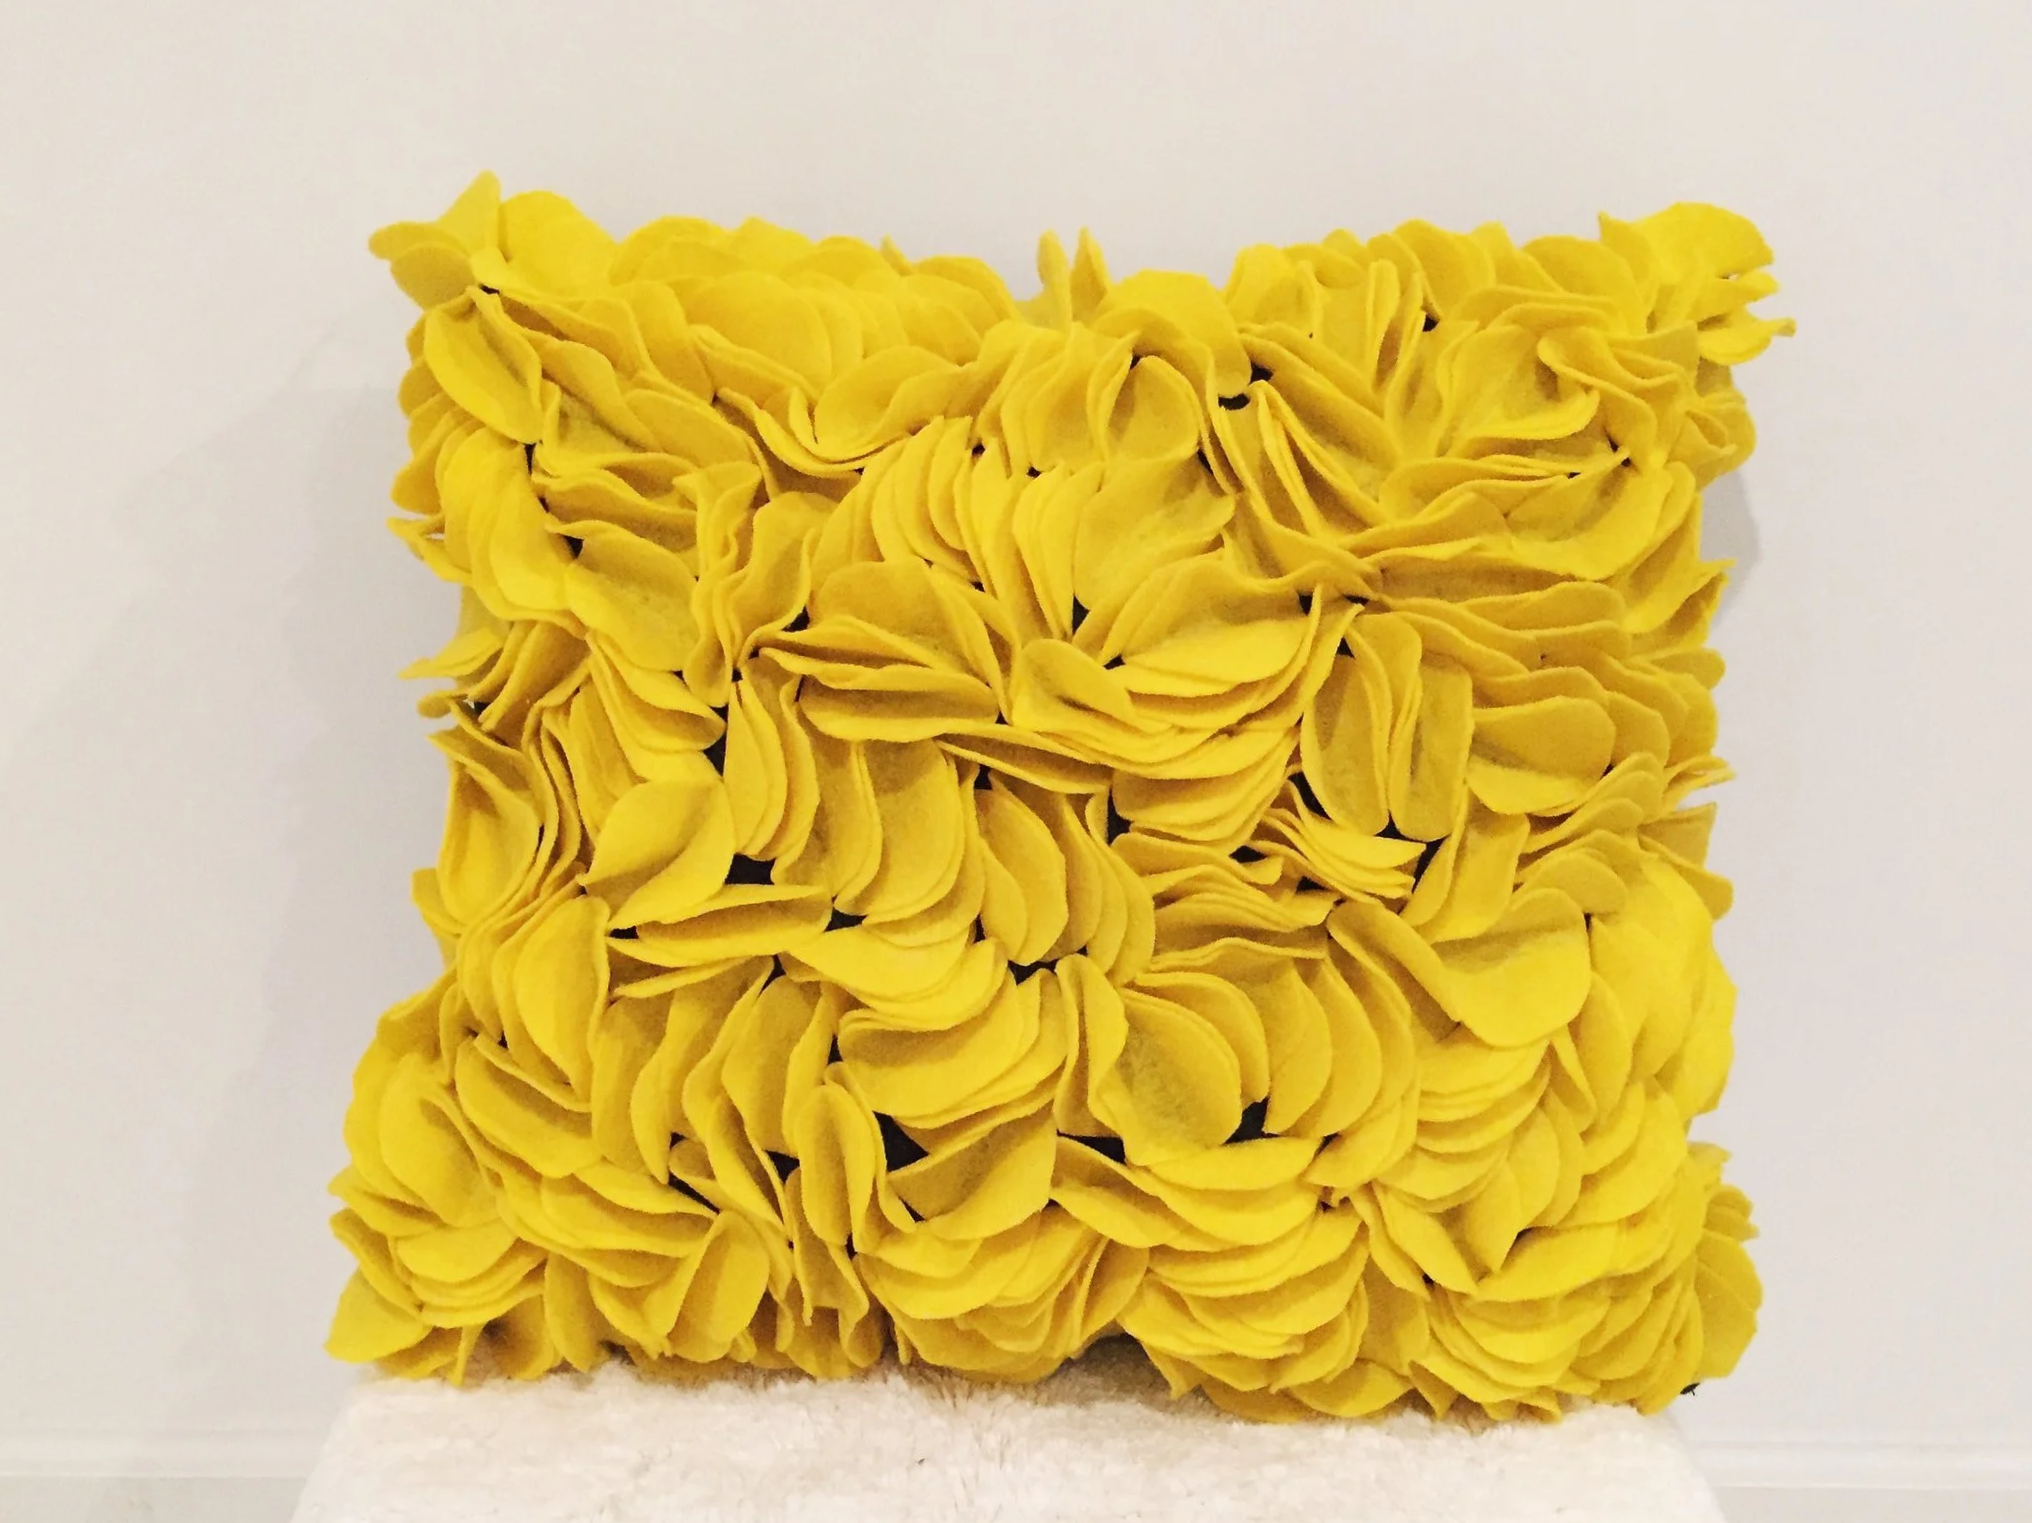
DIY No-Sew Felt Flower Pillow Tutorial (Under $15!)
Want to add a pop of color and texture to your space without dropping serious cash at West Elm? This felt flower pillow looks like it costs $60+ but actually costs less than lunch out. And here's the best part: no sewing machine required.
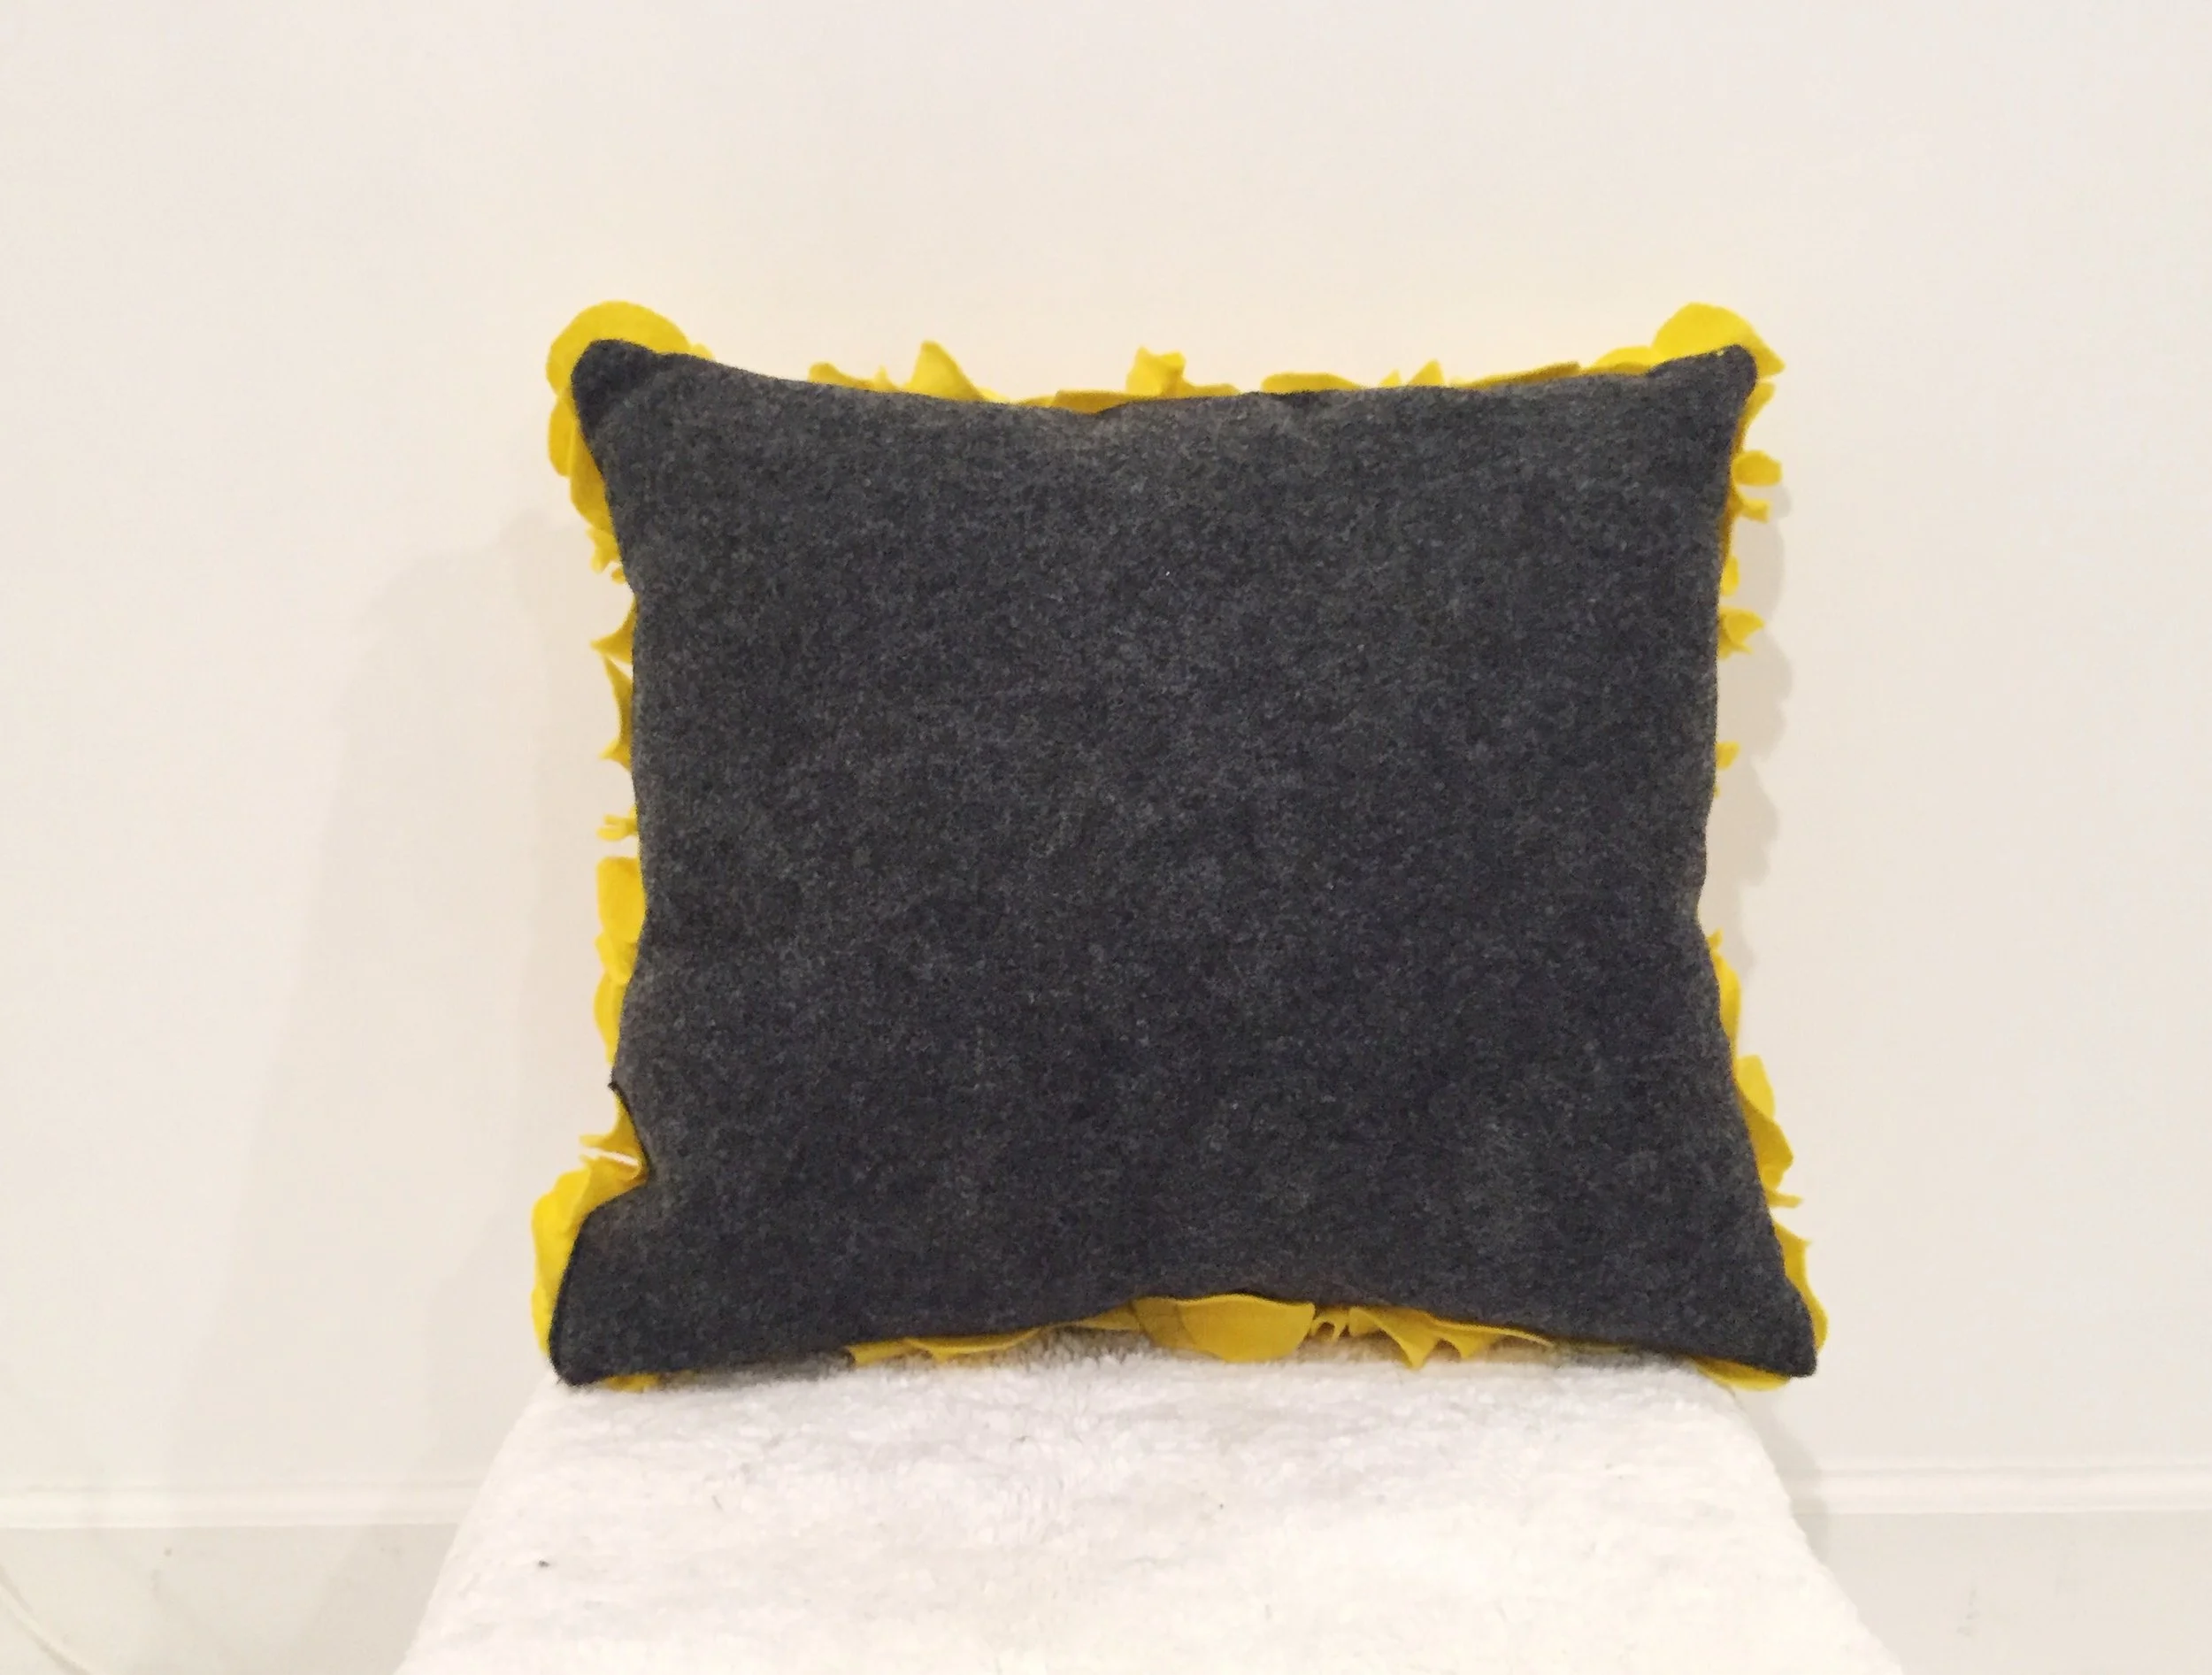
I made this yellow petal pillow for my living room, and every single person who comes over asks where I bought it. When I tell them I made it for under $15 at the craft store, they don't believe me. So I'm breaking down exactly how I did it—including the shortcuts that saved me hours.
What You'll Need
Supplies:
1.5 yards of felt fabric in your main color (I used yellow) - https://amzn.to/4828kaK
1/2 yard of felt for pillow backing (I used charcoal gray, cut costs by using the same color as the petals) - https://amzn.to/48aohfY
Polyfil stuffing (one bag can stuff at least two pillows) - https://amzn.to/4oz9RMd
Hot glue gun and glue sticks - https://amzn.to/4hUEuJv
Small mug or circular object (2-3 inches diameter)
Fabric scissors - https://amzn.to/3JWqqTc
Pencil or fabric marker- https://amzn.to/3JZvdTZ
Total Cost: $15 - $20 depending on what you already have at home
Time: About 2-3 hours (perfect for a weekend afternoon)
Note: You can get felt fabric from your local craft/fabric stores for much cheaper than online options.
Also, I'm recommending hot glue over fabric glue because it dries way faster and bonds to felt like nothing else. The faster dry time means you're not sitting around waiting between petals.
Why This Project Works
Look, I'm not going to pretend this is a 30-minute craft. But here's what makes it worth it: this pillow is fully customizable to your space. Picked a paint color you love? Match it with felt. Want something seasonal? Swap the colors. The technique is simple enough that once you've made one, you can knock out a whole couch's worth in different colors.
Plus, no sewing means no intimidating equipment. If you can use scissors and glue, you can make this.
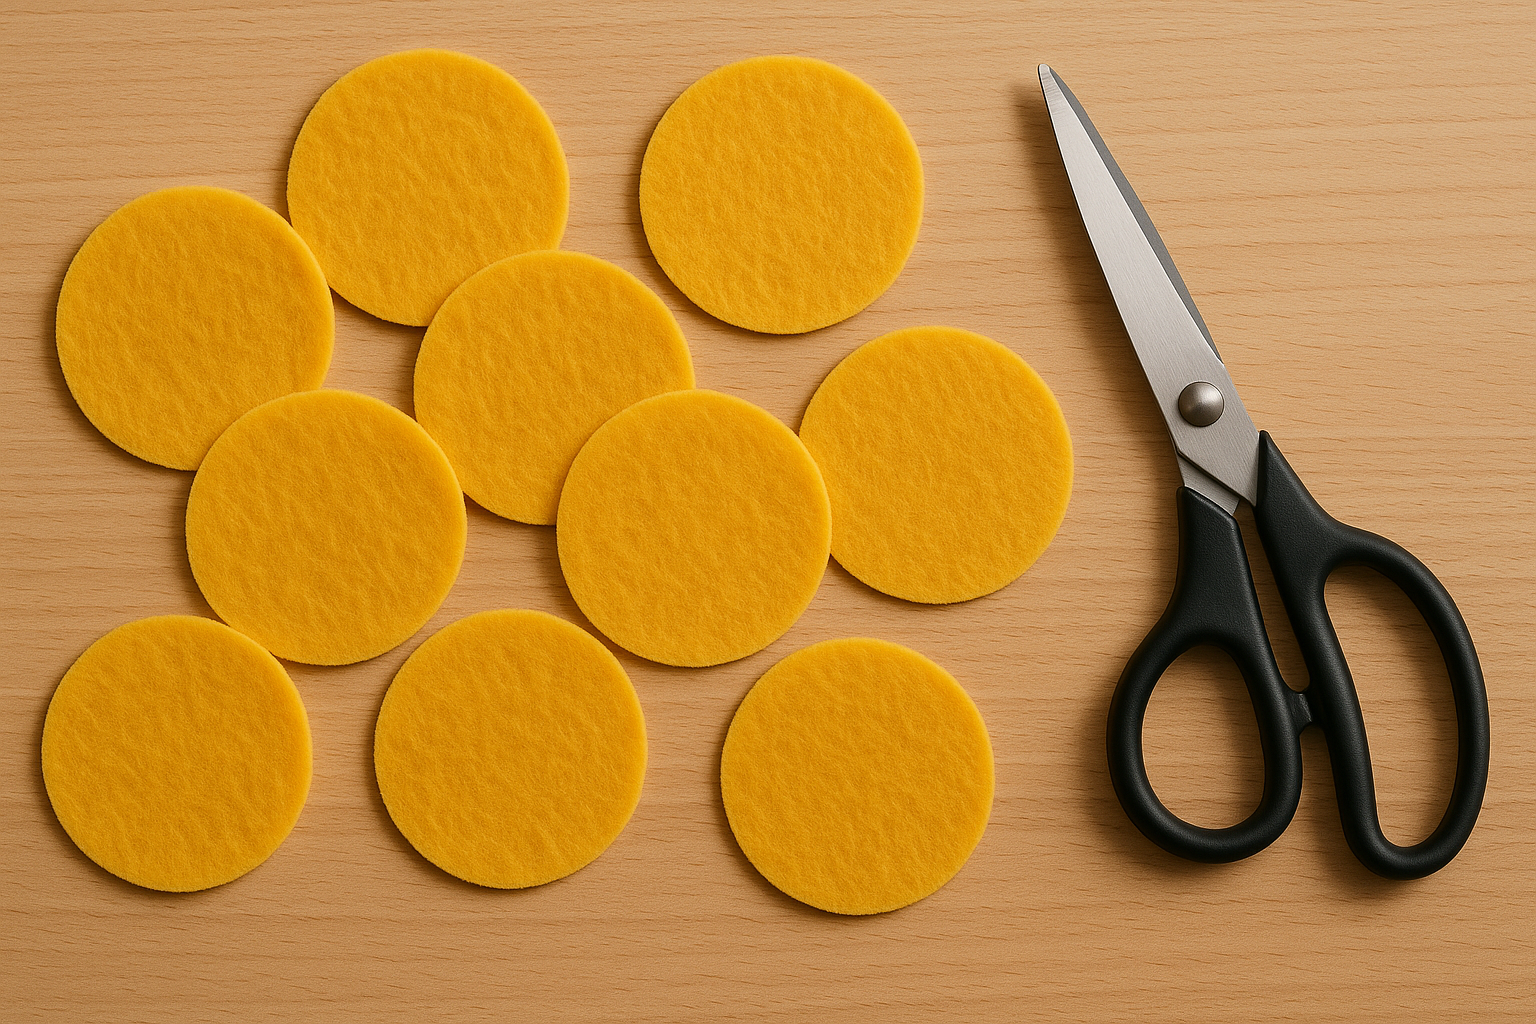
Step 1: Create Your Petal Template
This is where that random mug in your cabinet becomes useful. Take a small mug (mine was about 2.5 inches across at the bottom) and trace circles onto your felt. You're going to need about 120-150 petals for a 12x12 pillow.
Time-Saving Tip: Don't trace every single circle individually like I did the first time. Stack your felt 4-5 layers deep and cut multiple petals at once. This cuts your cutting time in half.
Cut out your circles. They don't have to be perfect—actually, slight variations make the final product look more organic and handmade in a good way.
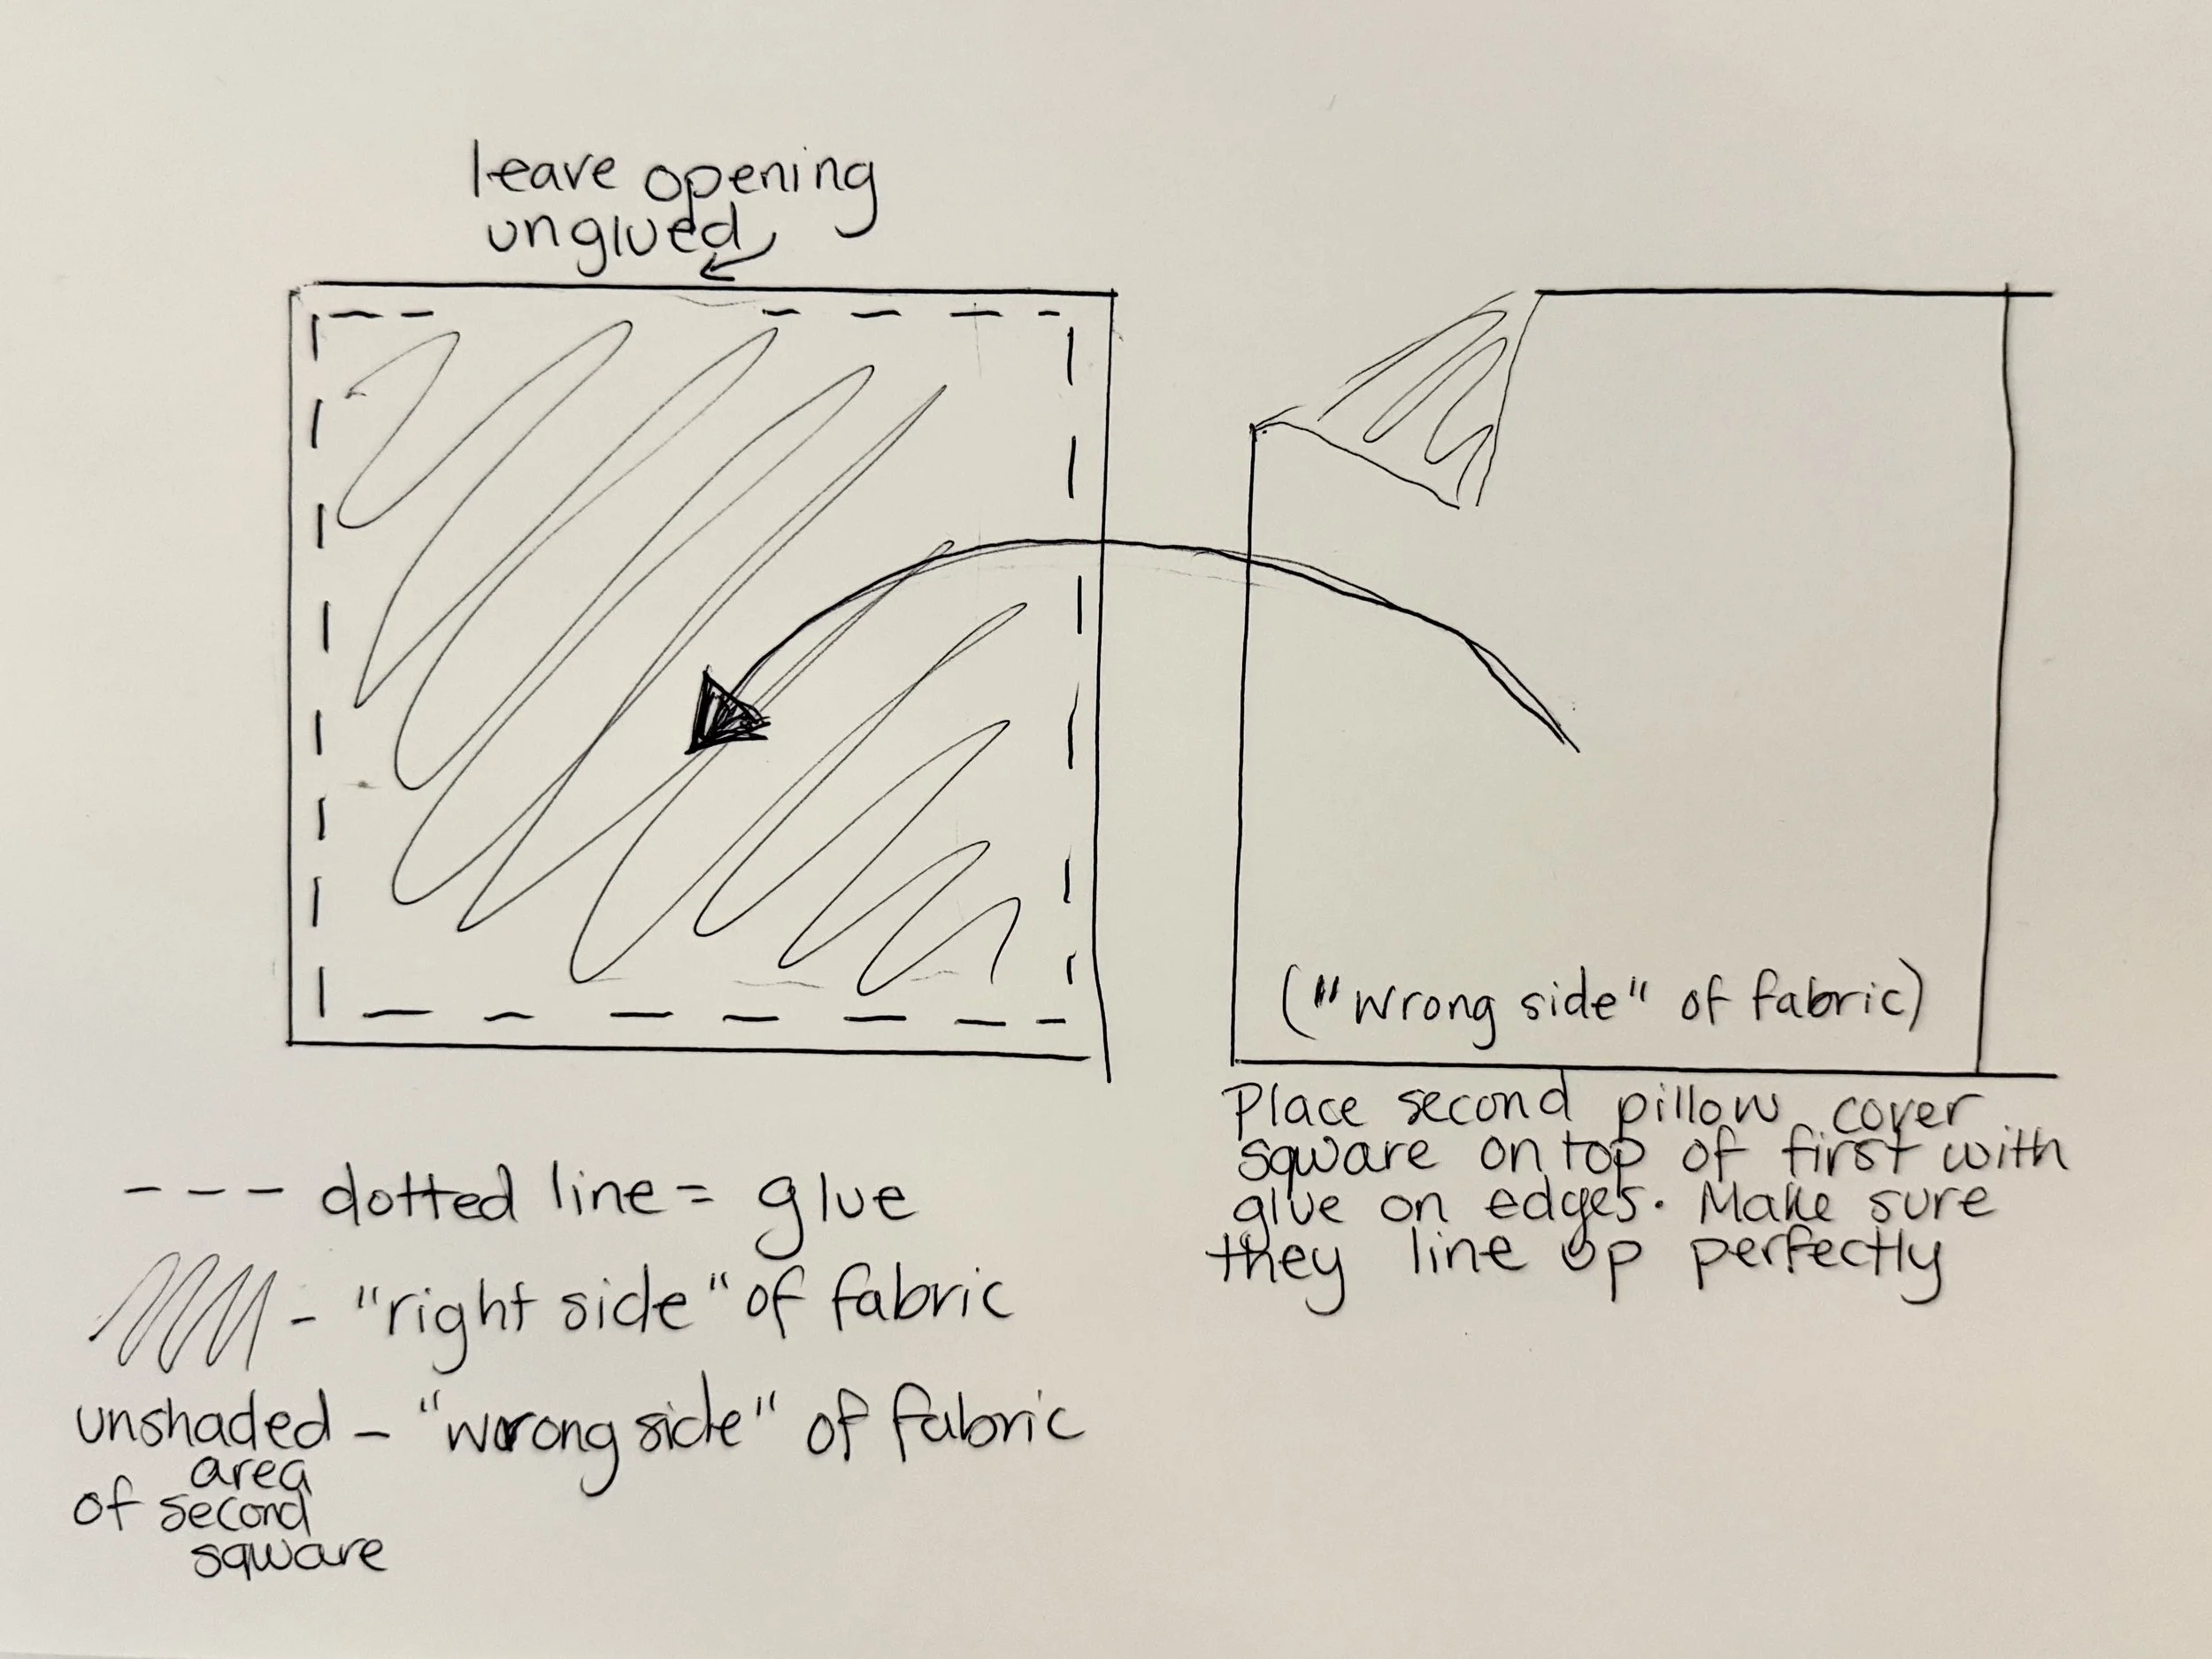
Step 2: Construct Your Pillow Base
Cut two squares of felt for your pillow: one in your main color (yellow) and one for the backing (charcoal gray). Make them the size you want your finished pillow to be—I did 12x12 inches.
Here's the construction method I use:
Place the two felt squares together with the "good" sides facing each other (if your felt has a right and wrong side)
Run a line of hot glue around the edges, about 1/4 inch from the edge, gluing three full sides and part of the fourth side. Leave a 4-5 inch opening on one side. This opening is crucial—you'll use it to turn the pillow right-side out and stuff it later.
Turn the pillow right-side out through that opening. Now your seams are hidden on the inside and you have a pillow cover with one opening.
Stuff it about 50% full with polyfil. Don't stuff it completely yet! You want enough filling to give the pillow some body and structure (and create a barrier in case any glue seeps through when you're adding petals), but you need to be able to work with it.
Why stuff it first? Hot glue doesn't really seep through felt, but having some stuffing in there gives you a working surface that has structure. Plus, you can adjust the final fullness later.
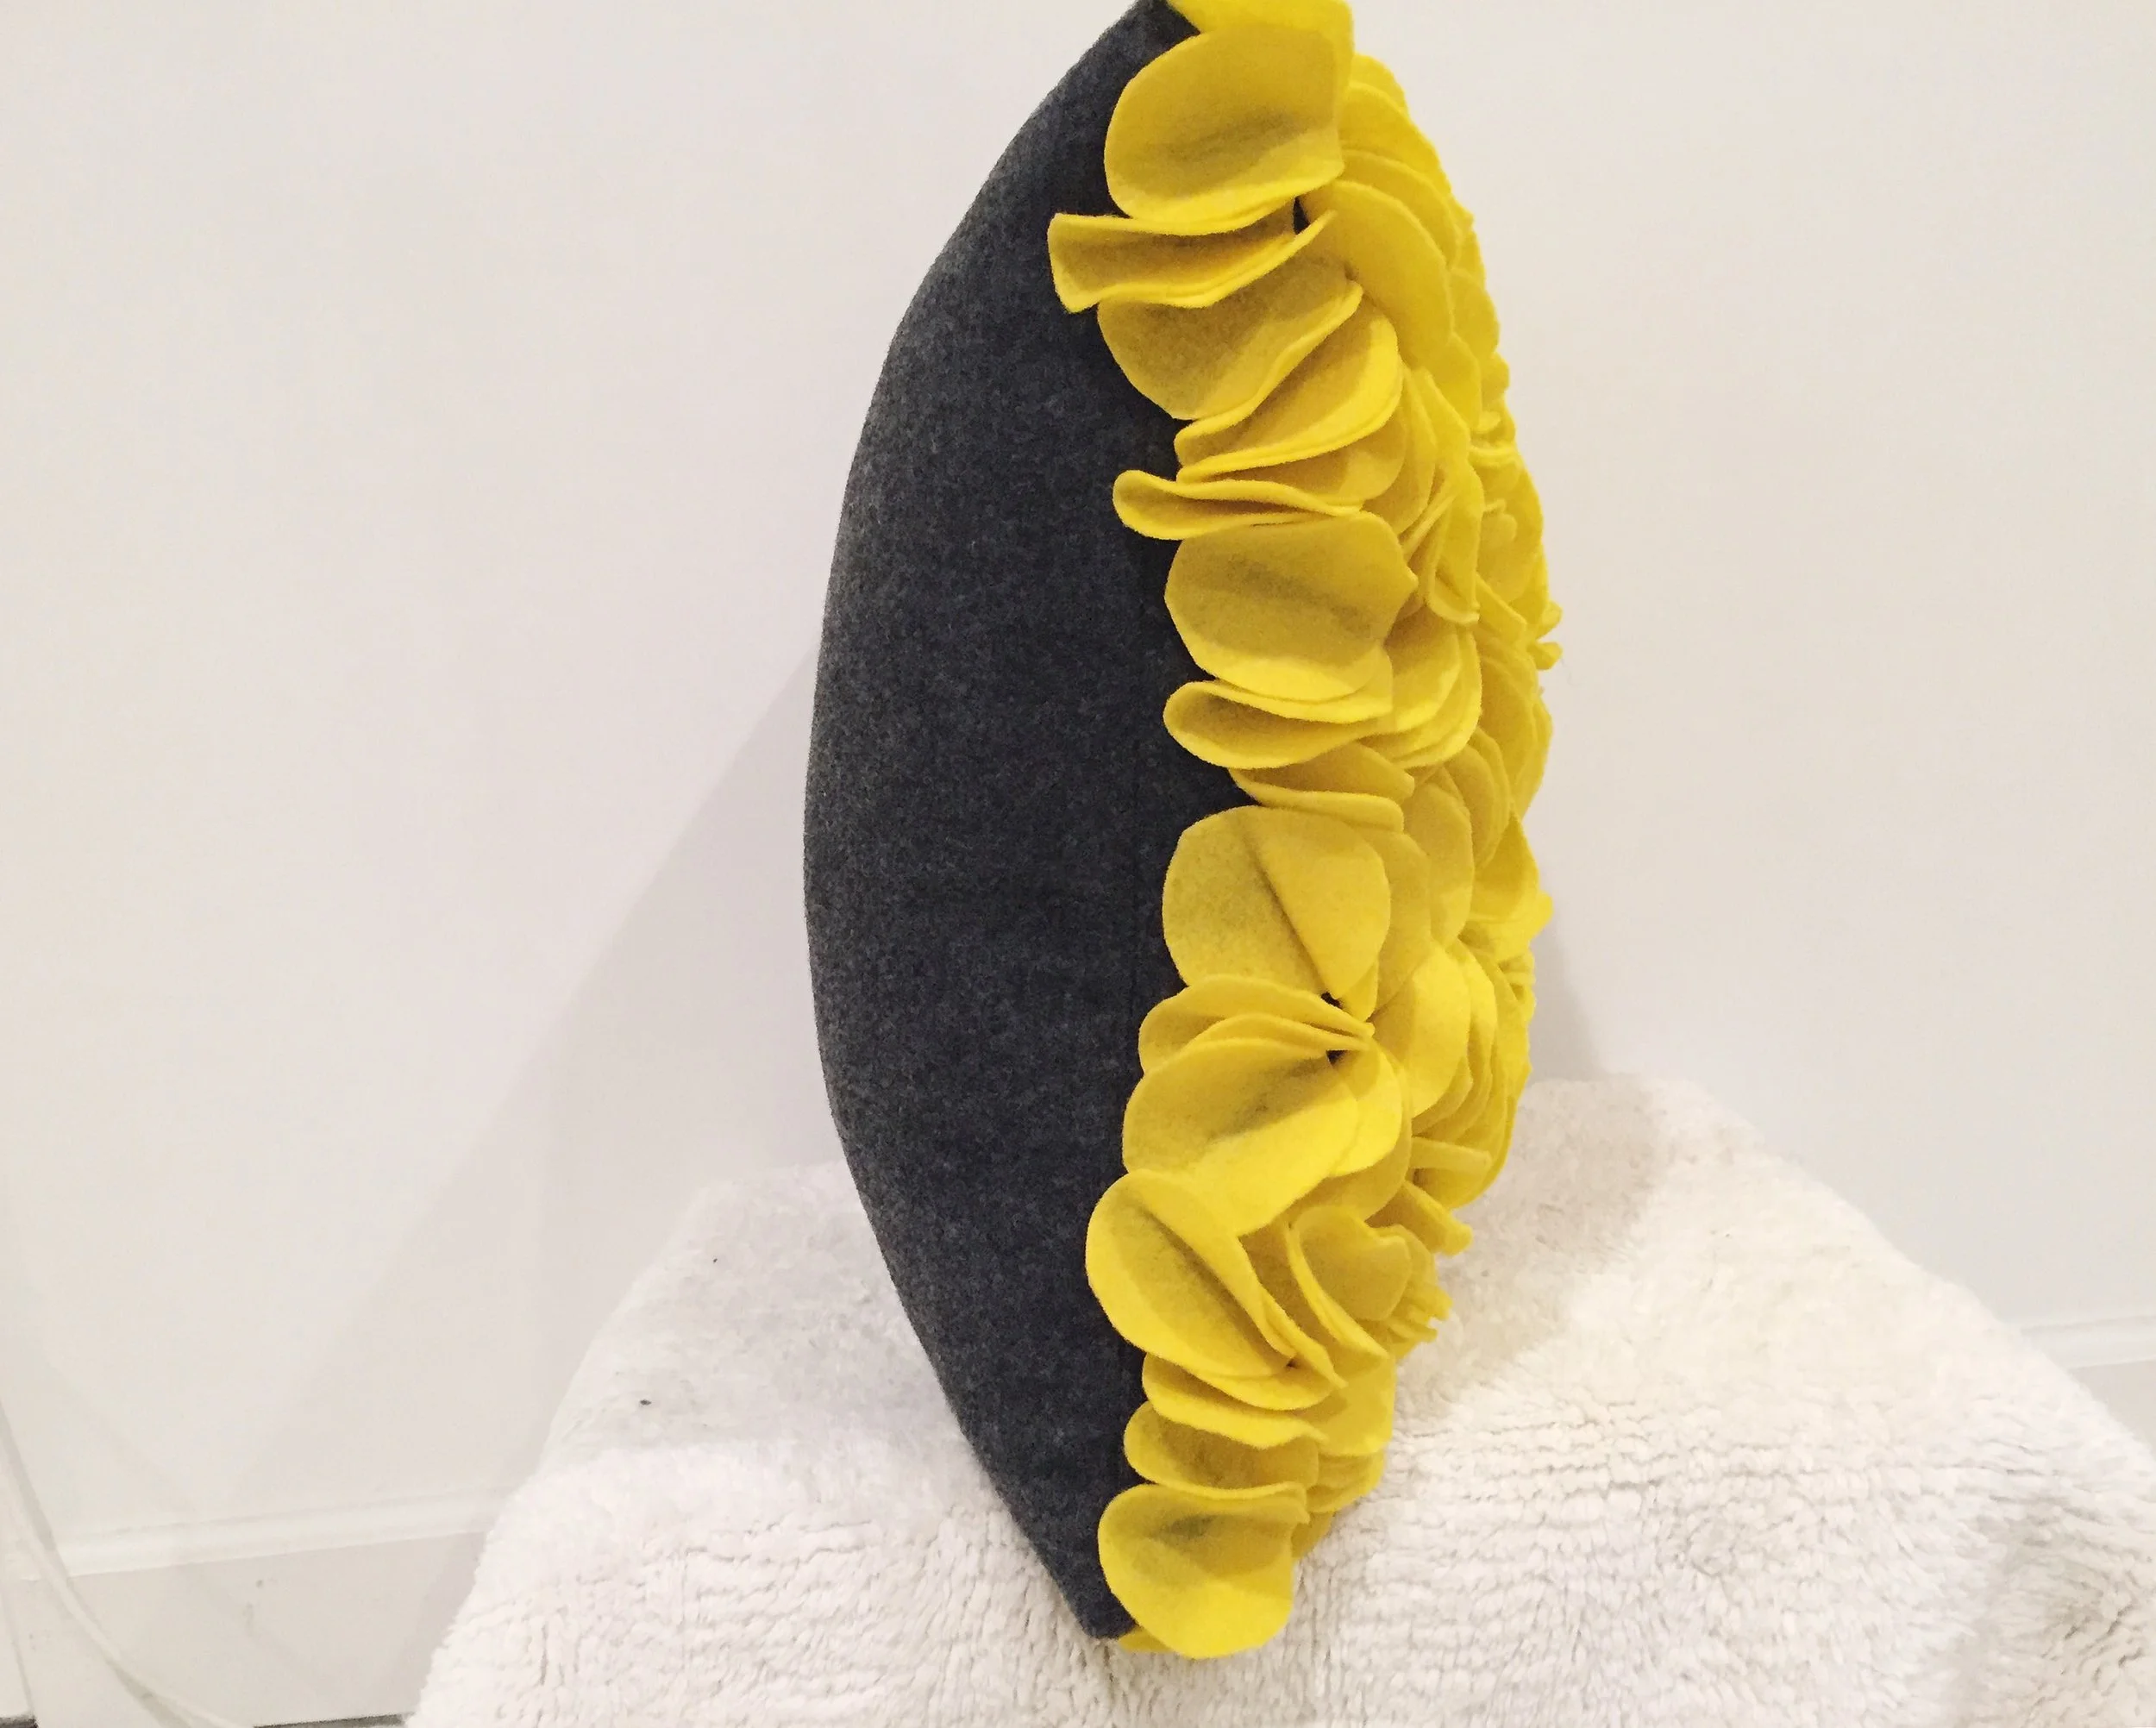
Step 3: The Gluing Technique (This Makes or Breaks the Look)
This is the secret that makes your pillow look expensive instead of like a craft fair reject.
Do NOT glue the entire petal down flat.
Here's what you do instead:
Fold each petal completely in half
Put a thin line of hot glue ONLY along the fold/crease
Press the folded petal onto your pillow base, keeping it folded
Hold for a few seconds until the glue sets (hot glue sets fast!)
The petal should stay folded in half with only that center crease attached to the pillow. This creates dimension and that fluffy, layered look you're going for.

Step 4: Build Your Flower Pattern
Start from the center of your pillow and work your way outward in a circular pattern. Place your folded petals close together, slightly overlapping as you go.
I worked in concentric circles, but you could also do a more organic scattered pattern. There's no wrong way—just keep that dimensional gluing technique consistent and it'll look intentional.
Pro tip: Step back every 15-20 petals to check your coverage. It's easier to add more petals as you go than to realize you have bald spots at the end.
Step 5: Finish the Pillow
Once you've glued all your petals down and you're happy with the coverage, it's time to finish stuffing and close it up.
Add more polyfil through the opening until the pillow is as full as you want it. I like mine pretty plump, but you can adjust based on your preference.
Close the opening: Take the raw edges of that opening and fold them inward (tucking them in the same direction as your other glued seams so everything looks clean). Run a line of hot glue along the folded edges and press them together to seal.
That's it! You now have a completely finished, no-sew felt flower pillow.
What I'd Do Differently Next Time
Take process photos as you go! I got so focused on making the pillow that I forgot to document everything. Learn from my mistake if you want to show off your project.
Buy more felt than you think you need. I ran out and had to make a second trip to the craft store. Get at least 1.5 yards of your main color to be safe.
Cut all your petals before you start gluing. It's tempting to cut as you go, but having all 120-150 petals ready means you can get into a rhythm with the gluing and not break your flow.
Can I Use Different Fabric?
You could try other fabrics, but here's why I love felt: once you glue felt together, it stays together forever. It takes the power of the glue gods to separate two pieces of felt that have been hot-glued. I can't say the same for other fabrics.
That said, if you want to experiment with softer or more luxurious materials, go for it! Just know that the bond might not be as strong and you might need to use more glue or reinforce with a few hand stitches.
Felt also doesn't fray when you cut it, which means less prep work and cleaner edges on your petals.
Color Combination Ideas
The yellow and gray combo I did gives off modern, contemporary vibes. But here are some other combinations that would look amazing:
Blush pink petals on cream backing - soft, romantic
All white - texture-on-texture minimalist
Styling Your Finished Pillow
This pillow has major visual impact, so you don't need much else. I styled mine on a solid-colored couch with one other simple pillow. The texture does all the talking.
It also photographs beautifully, which is a nice bonus if you're trying to make your space look good for guests (or Instagram).
The Bottom Line
Is this pillow a quick project? No. But is it worth the time investment? Absolutely. You're getting a custom, designer-looking accent piece for the price of a movie ticket. And once you've made one, you can replicate the technique for any room, any color scheme, any season.
If you're looking for other budget-friendly DIY projects that make your space look expensive, [check out my other tutorials here]. And if you make this pillow, I'd love to see it—tag me on Instagram [@hellocharmcitydiy] or send me a photo!
Frequently Asked Questions
Can I wash this pillow? Not really. Since it's glued, water would break down the adhesive. Spot clean only, or consider this a decorative-only pillow. Honestly, it's meant to sit pretty on your couch, not get tossed around.
How long does the glue hold up? Hot glue on felt is incredibly strong. As long as you're not throwing it around or letting kids use it as a toy, it holds up great. I haven't had a single petal fall off.
Can I use a different fabric instead of felt? You could try it, but felt works because it doesn't fray when cut, has enough structure to hold its folded shape, and bonds permanently with hot glue. Other fabrics might not give you the same results.
Do I really need that many petals? Yes. I tried to skimp and use fewer petals to save time, and you could see the gaps. Full coverage is what makes it look professional and expensive.
Can I make this pillow bigger or smaller? Absolutely! Just adjust your felt squares and the number of petals accordingly. A larger pillow will need more petals to get that full coverage.
Shop the Supplies
Making this project yourself? Here are the exact supplies I recommend:
Felt Fabric (Main Color) - https://amzn.to/4828kaK
I used 1.5 yards of yellow felt. Soft, cuts easily, and the perfect texture for this project.
Felt Fabric (Backing Color) - https://amzn.to/48aohfY
Half a yard is plenty for the backing. I love the contrast of charcoal gray.
Polyfil Stuffing - https://amzn.to/4oz9RMd
One small bag is more than enough. This stuff goes a long way.
Hot Glue Gun & Glue Sticks - https://amzn.to/4hUEuJv
If you don't already have one, this is a craft essential. Hot glue is the MVP of this entire project.
Fabric Scissors - https://amzn.to/3JWqqTc
Sharp scissors make cutting those 120-150 petals so much easier. Worth the investment.
Want more budget DIY projects? Sign up for my email list and get my free guide: "10 Must-Have Supplies for Budget DIY Projects Under $5 Each"
Disclosure: Some links in this post are affiliate links, which means I may earn a small commission if you make a purchase through them, at no additional cost to you. I only recommend products I actually use and love!